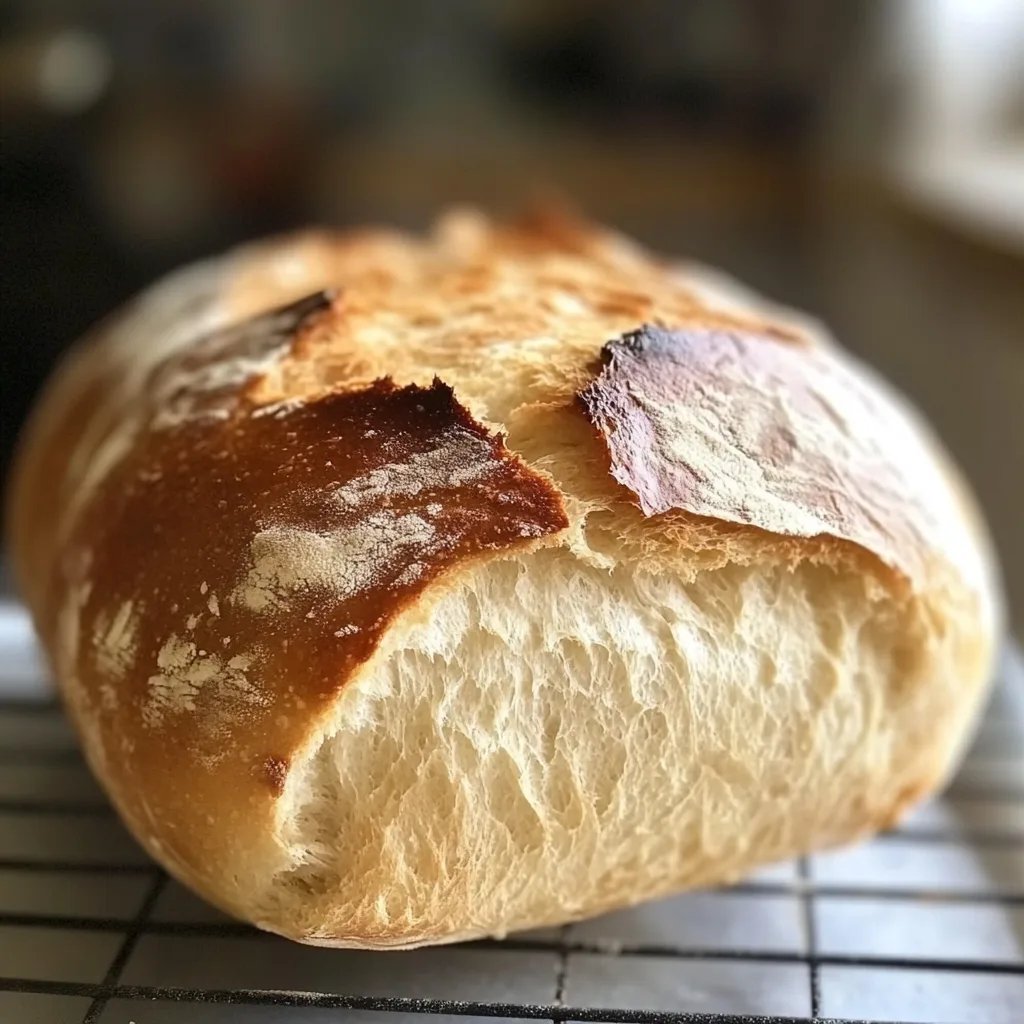
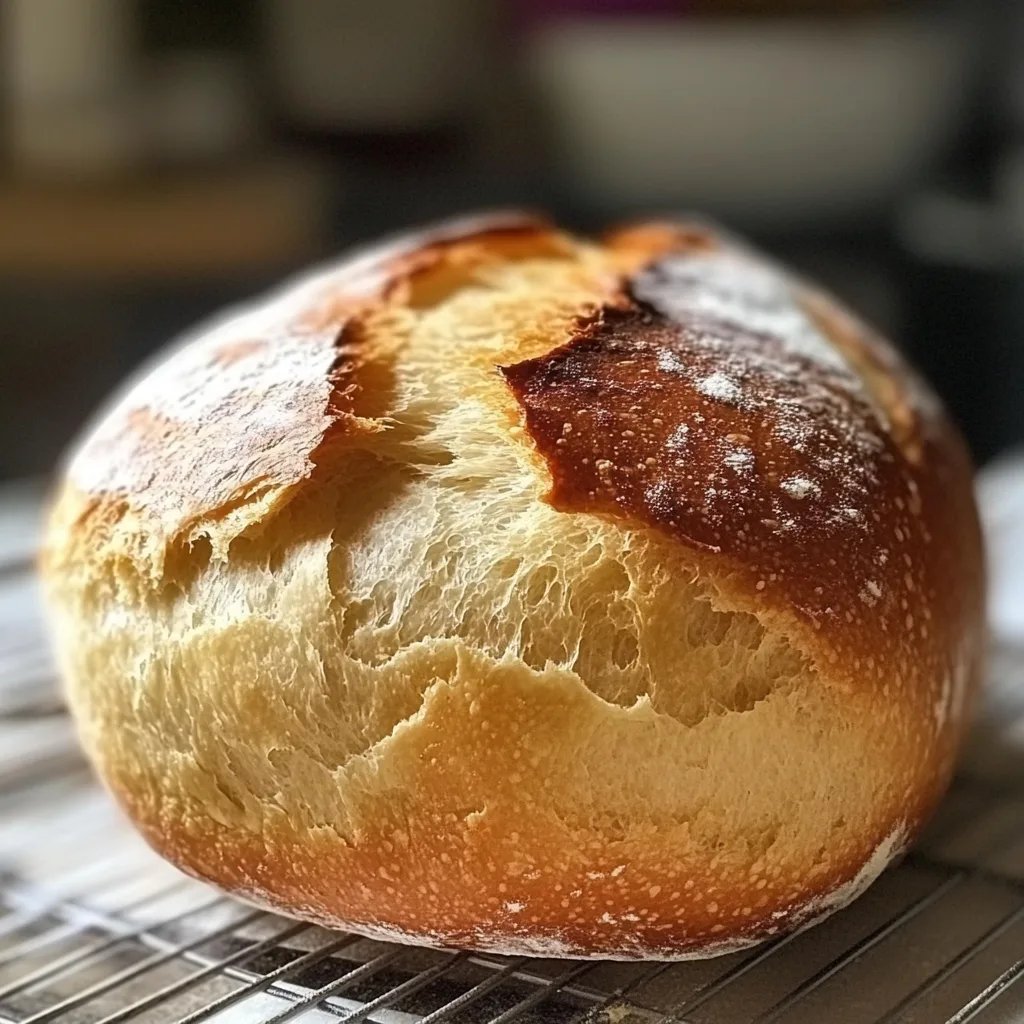
No Knead Gluten Free Bread
Highlighted under: Healthy Recipe Ideas
Discover the simplicity and deliciousness of this No Knead Gluten Free Bread recipe! Perfectly soft and crusty, this easy-to-make bread requires no fancy techniques or kneading, making it a fantastic option for busy bakers. Ideal for sandwiches, toast, or just enjoying warm with butter, this versatile bread will quickly become a staple in your gluten-free kitchen.
This No Knead Gluten Free Bread is designed to fit seamlessly into your busy lifestyle. With minimal effort, you can bake a loaf that will impress everyone.
The Benefits of No Knead Bread
No knead bread is revolutionizing the way we think about baking. For those who may feel intimidated by traditional bread-making techniques, this approach offers a hassle-free alternative. The absence of kneading not only simplifies the process, but it also allows the dough to develop complex flavors over time. Eager home bakers of all skill levels will appreciate how easy it is to create a loaf that is both crusty on the outside and soft on the inside without spending hours mixing and kneading.
This no knead gluten-free bread is not just easy; it's incredibly versatile. You can serve it fresh out of the oven with a pat of butter or use it as the base for delicious sandwiches. The options are endless! Additionally, the gluten-free ingredients make it suitable for those with dietary restrictions, allowing everyone to enjoy a slice of freshly baked goodness.
Moreover, the technique of allowing the dough to rise for an extended period promotes better texture and flavor. The fermentation during this period transforms your basic bread dough into something truly special, boasting a light and airy structure that rivals conventional bread. Whether you are preparing a quick breakfast or hosting a dinner party, this bread is sure to impress.
Storing and Enjoying Your Bread
Once your no knead gluten-free bread has cooled, proper storage is key to maintaining its freshness. Wrap the bread in a clean kitchen towel and store it at room temperature for up to three days. If you wish to keep it longer, consider slicing the loaf and freezing it. Each slice can then be toasted directly from the freezer, ensuring you always have a delicious option on hand, even at a moment's notice.
When it comes to serving suggestions, think beyond the basics. This bread is fantastic for avocado toast, grilled cheese sandwiches, or served alongside your favorite soups. You can create delightful appetizers by topping slices with pesto and sundried tomatoes or adding fresh herbs for extra flavor. With its soft texture and delightful crust, each bite will leave you wanting more. Don’t hesitate to experiment with your favorite toppings and pairings!
Lastly, consider customizing your no knead gluten-free bread by adding ingredients like herbs, spices, or even cheese to the dough before baking. This not only enhances the flavor but also makes the bread unique to your taste preferences. Elevate your baking with this adaptable recipe that allows for creativity and personalization!
Ingredients
Ingredients
Dry Ingredients
- 2 cups gluten-free all-purpose flour
- 1 teaspoon salt
- 1 teaspoon sugar
- 1 teaspoon baking powder
- 1/2 teaspoon baking soda
Wet Ingredients
- 1 1/2 cups warm water
- 1 tablespoon olive oil
- 1 teaspoon apple cider vinegar
Make sure all your ingredients are at room temperature before starting.
Instructions
Instructions
Mix Dry Ingredients
In a large mixing bowl, whisk together the gluten-free flour, salt, sugar, baking powder, and baking soda.
Combine Wet Ingredients
In another bowl, mix the warm water, olive oil, and apple cider vinegar.
Combine Mixtures
Pour the wet ingredients into the dry ingredients and stir until a dough forms.
Let the Dough Rise
Cover the bowl with plastic wrap and let it rise in a warm place for 30 minutes.
Preheat the Oven
Preheat your oven to 425°F (220°C) and place a Dutch oven (with the lid) inside to heat up.
Shape the Dough
Once risen, gently shape the dough into a ball and place it on parchment paper.
Bake the Bread
Carefully remove the hot Dutch oven, lift the dough using the parchment paper, and place it inside. Cover and bake for 30 minutes.
Finish Baking
Remove the lid and bake for an additional 15 minutes until golden brown.
Let the bread cool on a wire rack before slicing.
Pro Tips
For added flavor, consider incorporating herbs or spices into the dry ingredients.
Troubleshooting Your Bread
Even the most straightforward recipes can lead to minor challenges, so being prepared can help achieve the perfect loaf. If your bread doesn't rise as expected, double-check the freshness of your baking powder and baking soda. These leavening agents expire and can significantly impact your dough's ability to expand. Additionally, ensure that your warm water is not too hot; it should only feel warm to the touch to avoid killing the yeast.
Another common issue is a bread that turns out too dense. This could arise from overmixing the dough or not allowing it to rise long enough. Remember, a gentle hand is key. The more you handle gluten-free dough, the more likely it will become compact. Allow it to relax during the rising process, creating a lighter texture.
Health Benefits of Gluten-Free Bread
Choosing gluten-free bread can have several health benefits, especially for individuals with gluten sensitivities or celiac disease. This no knead gluten-free bread is made with ingredients that are naturally free from gluten, reducing inflammation and digestive issues for those who consume it. By opting for gluten-free alternatives, you can enjoy baked goods without compromising your health.
Furthermore, this recipe includes wholesome ingredients such as oats or almond flour, which are rich in fiber, vitamins, and minerals. These components not only contribute to digestive health but can also keep you feeling fuller for longer. With this bread, you can enjoy a nutritious option that supports a balanced diet while satisfying your cravings.
Questions About Recipes
→ Can I use a different gluten-free flour?
Yes, just ensure it's a 1:1 gluten-free flour blend for best results.
→ How should I store the bread?
Store it in an airtight container at room temperature for up to 3 days or freeze for longer storage.
No Knead Gluten Free Bread
Created by: The Quickbitehub Team
Recipe Type: Healthy Recipe Ideas
Skill Level: Beginner
Final Quantity: 1 loaf
What You'll Need
Dry Ingredients
- 2 cups gluten-free all-purpose flour
- 1 teaspoon salt
- 1 teaspoon sugar
- 1 teaspoon baking powder
- 1/2 teaspoon baking soda
Wet Ingredients
- 1 1/2 cups warm water
- 1 tablespoon olive oil
- 1 teaspoon apple cider vinegar
How-To Steps
In a large mixing bowl, whisk together the gluten-free flour, salt, sugar, baking powder, and baking soda.
In another bowl, mix the warm water, olive oil, and apple cider vinegar.
Pour the wet ingredients into the dry ingredients and stir until a dough forms.
Cover the bowl with plastic wrap and let it rise in a warm place for 30 minutes.
Preheat your oven to 425°F (220°C) and place a Dutch oven (with the lid) inside to heat up.
Once risen, gently shape the dough into a ball and place it on parchment paper.
Carefully remove the hot Dutch oven, lift the dough using the parchment paper, and place it inside. Cover and bake for 30 minutes.
Remove the lid and bake for an additional 15 minutes until golden brown.
Extra Tips
For added flavor, consider incorporating herbs or spices into the dry ingredients.
Nutritional Breakdown (Per Serving)
- Calories: 120
- Protein: 2g
- Carbohydrates: 24g
- Fat: 2g